Are you a nature lover in search of a paradise that will leave you breathless? Look no further than the Annapurna Conservation Area. Nestled in the heart of the majestic Himalayas, this pristine sanctuary offers a unique blend of awe-inspiring landscapes, diverse wildlife, and rich cultural heritage. Stretching over 7,629 square kilometers, the Annapurna Conservation Area is a haven for adventure seekers and nature enthusiasts alike. From the towering peaks of Annapurna I and Machapuchare to the lush forests teeming with rare flora and fauna, every step in this remarkable region will leave you in awe.

But the Annapurna Conservation Area is not just about its natural beauty. It is also home to vibrant local communities, where you can immerse yourself in the warm hospitality and traditions of the Nepalese people. Whether you’re trekking through the enchanting trails, capturing breathtaking photographs, or simply seeking solace in nature’s embrace, the Annapurna Conservation Area promises an unforgettable experience that will rejuvenate your spirit and leave you yearning for more.
Location and geography of Annapurna Conservation Area
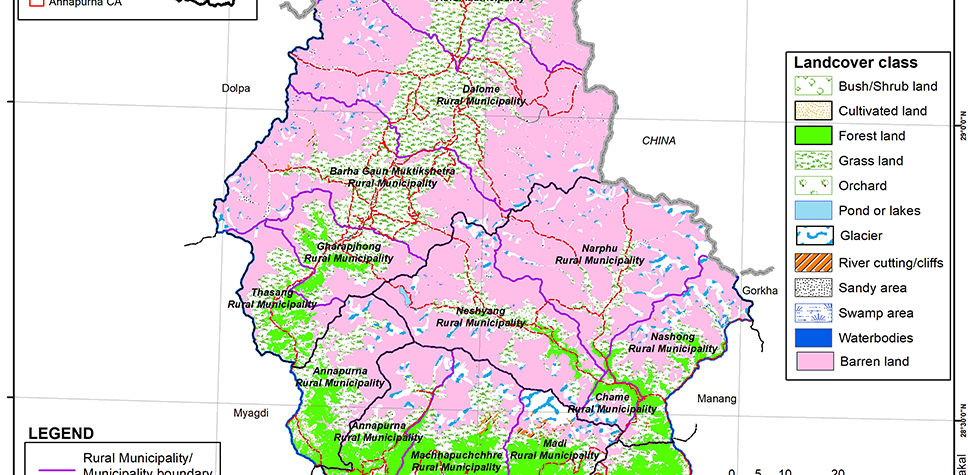
Located in the north-central part of Nepal, the Annapurna Conservation Area is a paradise for nature lovers. It is part of the larger Annapurna range, which is renowned for its towering peaks and breathtaking landscapes. The conservation area spans five districts – Manang, Mustang, Kaski, Myagdi, and Lamjung – and encompasses a wide range of geographical features. From snow-capped mountains to deep gorges, cascading waterfalls, and terraced fields, the diverse topography of the region offers a visual treat at every turn.

The Annapurna Conservation Area is home to several prominent peaks, including Annapurna I, which stands at a staggering height of 8,091 meters. This majestic mountain has long been a magnet for mountaineers from around the world, offering a thrilling challenge and a sense of achievement for those who conquer its summit. Additionally, the iconic Machapuchare, also known as the “Fishtail Mountain,” with its unique double-peaked summit, adds to the allure of the region.
Biodiversity and Wildlife in Annapurna Conservation Area
The Annapurna Conservation Area boasts an incredibly rich biodiversity, making it a haven for nature enthusiasts and wildlife lovers. The region is home to more than 1,200 species of plants, including several rare and endangered varieties. The diverse flora ranges from colorful rhododendrons and orchids to medicinal herbs and alpine vegetation. As you traverse through the enchanting trails, you’ll be greeted by a symphony of colors and fragrances, truly immersing you in the beauty of nature.

In addition to its stunning flora, the Annapurna Conservation Area is also a sanctuary for a wide variety of wildlife. The region is home to elusive snow leopards, Himalayan tahr, musk deer, and red pandas, among other rare and endangered species. Birdwatchers will be delighted to spot over 450 species of birds, including the vibrant Himalayan monal and the elusive pheasant. With such a diverse range of flora and fauna, the Annapurna Conservation Area offers endless opportunities for nature lovers to connect with the natural world.
Trekking and hiking routes in Annapurna Conservation Area
For adventure seekers and outdoor enthusiasts, the Annapurna Conservation Area offers some of the most iconic trekking and hiking routes in the world. The region is crisscrossed by a network of well-maintained trails that cater to all levels of experience. Whether you’re a seasoned trekker or a novice hiker, there’s a route for everyone.

The Annapurna Circuit Trek is one of the most popular options, providing an immersive experience through diverse landscapes and traditional mountain villages. This trek takes you around the entire Annapurna massif, offering breathtaking views of the majestic peaks and allowing you to witness the local way of life up close.
If you’re short on time but still want to experience the beauty of the region, the Annapurna Base Camp Trek is a perfect choice. This trek takes you to the base camp of Annapurna I, where you’ll be surrounded by towering mountains and panoramic views.
For those seeking a more off-the-beaten-path adventure, the Upper Mustang Trek offers a unique glimpse into the ancient Tibetan culture and a chance to explore the remote and arid landscapes of the Mustang region.
Cultural Heritage and local communities in Annapurna Conservation Area
Beyond its natural beauty, the Annapurna Conservation Area is also a treasure trove of cultural heritage and local communities. The region is inhabited by various ethnic groups, including Gurungs, Thakalis, and Manangis, each with their distinct traditions and way of life. As you traverse through the trails, you’ll have the opportunity to interact with the friendly locals, learn about their customs, and even participate in traditional festivities.

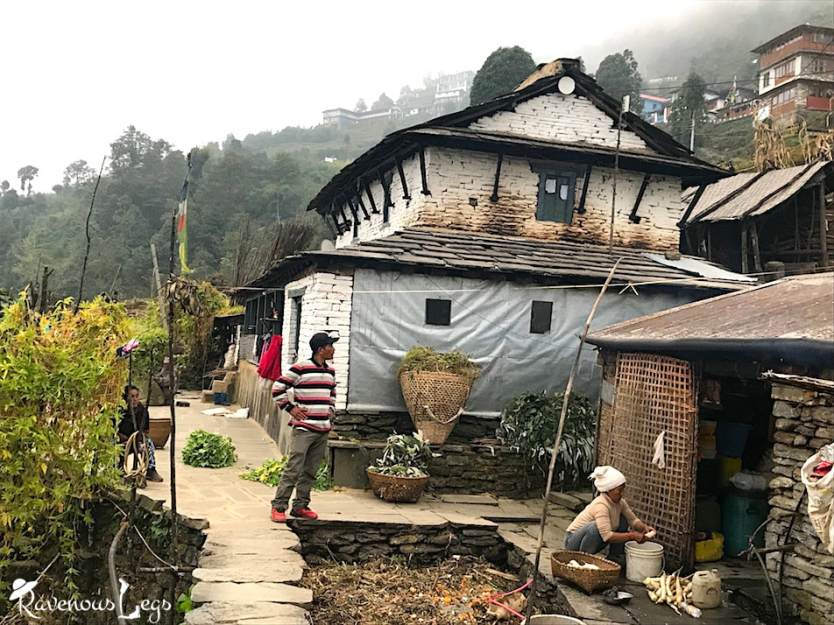
The villages along the trekking routes offer a glimpse into the rich cultural heritage of the region. From traditional stone houses adorned with intricate wood carvings to ancient monasteries perched on hilltops, the architectural wonders of the Annapurna Conservation Area will transport you back in time. Don’t miss the opportunity to savor the local cuisine, which includes delicious dishes like dal bhat (lentils and rice) and momo (steamed dumplings), while enjoying the warm hospitality of the locals.
Conservation Efforts and sustainable tourism in Annapurna Conservation Area
Preserving the pristine beauty of the Annapurna Conservation Area is of utmost importance, and several conservation efforts have been put in place to ensure its sustainability. The Annapurna Conservation Area Project (ACAP), established in 1986, has been instrumental in promoting sustainable tourism and biodiversity conservation in the region. ACAP works closely with local communities to raise awareness about environmental conservation and provides support for eco-friendly practices.
To minimize the impact of tourism on the fragile ecosystem, permits are required to enter the Annapurna Conservation Area. These permits help fund conservation projects and support local communities. Additionally, trekking agencies and guides are encouraged to follow responsible tourism practices, such as waste management and minimizing the use of plastic.
Best time to visit Annapurna Conservation Area
The best time to visit the Annapurna Conservation Area is during the spring (March to May) and autumn (September to November) seasons. During these months, the weather is generally clear, and the skies offer stunning views of the mountains. The spring season brings blooming rhododendrons and wildflowers, while the autumn season offers pleasant temperatures and clear visibility.
However, it’s important to note that weather conditions in the Himalayas can be unpredictable, and it’s always advisable to check the forecast and be prepared for changes. It’s also worth considering the level of trekking experience you have and your tolerance for crowds, as the peak seasons can be quite busy on popular routes.
Read more about Best Time to Visit Nepal
Accommodation and facilities in Annapurna Conservation Area
While trekking in the Annapurna Conservation Area, you’ll find a range of accommodation options to suit every budget and preference. Along the trails, there are homestays, tea houses, and lodges that offer basic amenities such as beds, hot showers, and meals. These accommodations provide a cozy and comfortable place to rest after a day of trekking.
For those seeking a more luxurious experience, there are also upscale lodges and resorts available in some of the larger towns and villages. These establishments offer modern amenities, including comfortable beds, hot showers, and delicious meals prepared with fresh local ingredients.
Safety tips and precautions for visiting Annapurna Conservation Area
While the Annapurna Conservation Area offers a breathtaking adventure, it’s essential to prioritize safety during your visit. Here are some safety tips and precautions to keep in mind:
- Acclimatize properly: High altitude can pose risks, so it’s crucial to acclimatize gradually to minimize the chances of altitude sickness. Take it slow, stay hydrated, and listen to your body.
- Hire a licensed guide: Trekking with a licensed guide ensures you have someone with local knowledge and experience to navigate the trails and provide assistance in case of emergencies.
- Stay on designated trails: Straying off the designated trails can hurt the environment and increase the risk of getting lost. Always follow the marked paths and avoid shortcuts.
- Be prepared for weather changes: Weather conditions in the mountains can change rapidly. Pack appropriate clothing layers, including warm jackets, hats, gloves, and rain gear, to protect yourself from unpredictable weather.
- Stay hydrated and eat well: Proper nutrition and hydration are crucial during trekking. Drink plenty of water, carry water purification tablets, and eat nutritious meals to maintain your energy levels.
Remember, safety should always be a priority, and it’s essential to be well-prepared and informed before embarking on any trekking adventure.
Conclusion: Experiencing the beauty of Annapurna Conservation Area
The Annapurna Conservation Area is a nature lover’s paradise that offers a unique blend of natural beauty, cultural heritage, and adventure. From the awe-inspiring landscapes to the rich biodiversity and vibrant local communities, every aspect of this remarkable region will leave you in awe. Whether you’re trekking through the enchanting trails, capturing breathtaking photographs, or immersing yourself in the warm hospitality of the Nepalese people, the Annapurna Conservation Area promises an unforgettable experience that will rejuvenate your spirit and leave you yearning for more. So, pack your bags, lace up your boots, and embark on a journey to this nature lover’s paradise – the Annapurna Conservation Area awaits your exploration.
Discover more from Nepal Travel Vibes
Subscribe to get the latest posts sent to your email.


