Want to build a successful WordPress company directory? We’ll show you how in just three steps!

Whether you’re trying to find a web designer or a plumber, having a list of options can help you get the perfect fit. This nearly universal truth makes a WordPress company directory an essential tool. As such, you may be interested in learning how to create one yourself.
Fortunately, building this type of website doesn’t have to be a guessing game. You can focus on including relevant categories, pages, and advanced settings for an effective WordPress company directory.
In this article, we’ll cover which features you might want to include in a WordPress business directory. Then we’ll show you how to build one in just three steps. Let’s go!
What to include in your company directory
Company directories can be useful for nearly every industry. As you might expect, this means that no two websites will have the same needs. However, there are a few essential features that tend to be universally valuable.
One of the most important elements of a WordPress company directory is organization. The reason is simple: the easier your site is to use, the better your customer experience will be.
Consider sorting listings into clearly defined categories. It can help your users find their desired companies quicker. You can also provide an easily-accessible search function.
You may also want to consider making a paid company directory. Requiring a fee to submit listings is a simple way to monetize your directory site. Additionally, you can offer a free version to help your user base continuously grow.
Finally, you may want to provide businesses with a variety of form fields. Elements such as additional images, social media links, and date fields can help maximize the potential of each listing. Making each one optional can also help you appeal to a variety of companies.
How to build a WordPress company directory (in 3 steps)
Before starting this walkthrough, make sure you have installed and activated one of Business Directory Plugin's premium plans.
Step 1: Add your pages and categories
Let’s begin with the basic structure of your WordPress company directory. First, you’ll need to create two pages: one for the directory and one for the submission page.
The first one should automatically created for you. If it isn’t, you can make it yourself by adding the following shortcode to a new page:
[businessdirectory]Add the title of your directory to the page. Then create another new page and add the following shortcode. This will enable users to submit listings:
[businessdirectory-submit-listing]Next, it’s time to add categories. Go to Directory → Categories:
Fill out the menu on the left and click on Add New Category. Then repeat the process as many times as needed.
Using parent categories can help organize your site further. Additionally, you might want to consider using our enhanced categories add-on to include features such as category images.
Finally, you can choose a directory theme. Go to Directory → Themes:
These style elements won't replace your WordPress theme. On the contrary, they'll only impact your listings. While adding them is completely optional, they can make your site look more professional.
Step 2: Create your plan, form, and listings
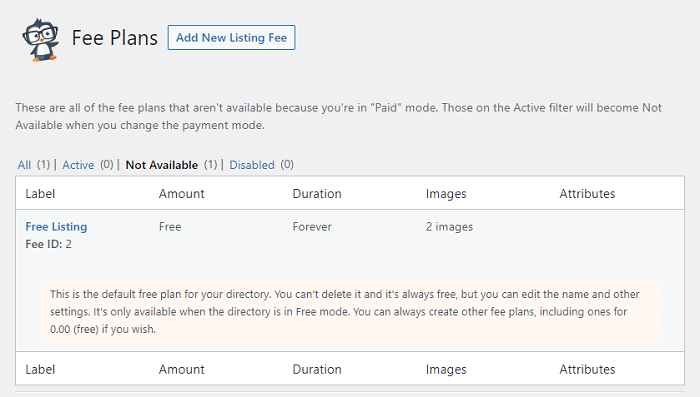
You’re not required to add a paid plan. However, you may want to create one or customize the default free option.
To do this, go to Directory → Plans:
If you want to add a paid option, click on Add New Plan. Alternatively, you can edit the default plan by hovering over it and selecting Edit.
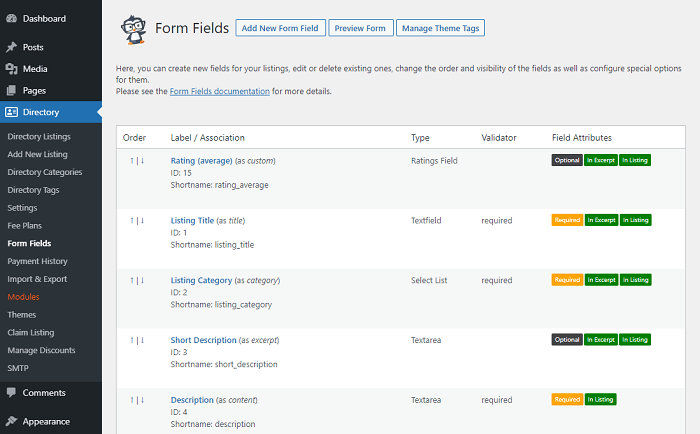
Now, you can create your submission form. To see your current form fields, go to Directory → Form Fields.
To edit an existing field, click on it. Alternatively, you can build a new one with the Add New Form Field button. You can also add custom fields.
Finally, you can change the organization of the form. Fortunately, you can easily rearrange it using the arrows on the left-hand side under Order.
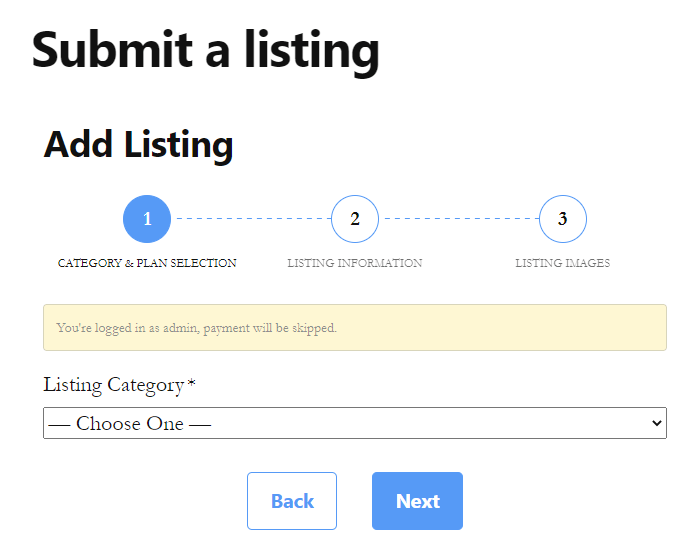
After you’ve customized your form, you can start adding listings. We recommend doing this from the front end because it's the most intuitive approach.
Go to the page you created earlier for submissions. Follow the on-screen prompts to add listings:
However, this may not be the most effective approach if you have a large number of listings. In that case, consider speeding up the process by importing a Comma Separated Values (CSV) file instead.
Step 3: Consider including advanced features in your WordPress company directory
You should now have a basic WordPress company directory ready to go. However, you might want to consider a few advanced elements to help your site stand out.
For example, we mentioned adding a search function earlier. The basic settings will only look for keywords in the title of each listing. If you'd like to change this, you can edit your directory's quick search field.
Furthermore, you may also want to add ratings and reviews to listings. These features can boost customer engagement. They can also help ensure that you're providing users with the highest-quality companies available.
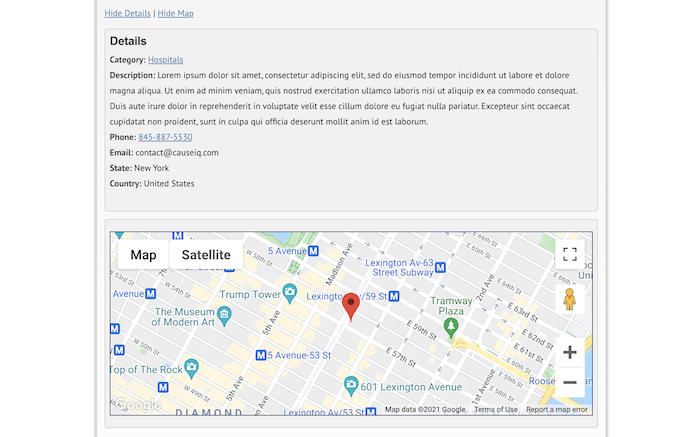
Another option to consider is adding a map to each listing:
This is a simple yet professional touch. A map can be handy if you're building a WordPress company directory based on local groups, such as a chamber of commerce.
Finally, there's one last behind-the-scenes part of your site that's worth spending time on: Search Engine Optimization (SEO). This is the process of helping your directory appear higher in search engine results. Check out a few of our SEO tips to increase your website's reach.
Conclusion
Building a WordPress company directory can seem intimidating. Between catering to your niche and providing top-tier features, it can be hard to know where to get started. Fortunately, you can create a solid base by focusing on essential settings.
In this article, we showed you how to build a WordPress company directory in three steps:
- Create your directory page, submission page, and listing categories.
- Add plans along with your submission form and the listings.
- Consider advanced features to take your website to the next level.
Business Directory Plugin can help you include every feature we covered in this walkthrough – and much more. Consider investing in a premium plan today!


Leave a Reply